This post may contain affiliate links and I may earn a small commission if you choose to shop through the links provided at no extra cost to you. Please know that while I may be promoting products in this post, all opinions are my own and these are products I love and support.
I would like to start off by saying that I am not a professional website creator or even a professional blogger. In fact, I have only been doing this gig for about 2 months. However, I have received multiple questions regarding how I set up my website, so I’d thought I would share what I did so that maybe it could help you learn how to start a blog! When I first began my research on how to get this whole things started to say I was overwhelmed was an understatement. My entire purpose for starting this blog was to 1- have a creative outlet and 2-make money so that one day I can work from home. It was a little scary I am not going to lie. Fear of failing and rejection were definitely holding me back all these years. But, as they say, “you will always regret the chances you didn’t take”, and here we are!

My entire purpose for starting this blog was to 1- have a creative outlet and 2-make money so that one day I can work from home.
Step 1: Choosing a Topic
Before you even begin you want to have a clear niche or topic you want to blog about. What are you interested in? What kind of blogs do you gravitate towards? Do you have any hobbies or passions? Choose what speaks to you. For my niche I chose: Lifestyle & DIY Blog. I chose Lifestyle because it was broad. I didn’t want to limit myself to “fashion blogger” or “beauty blogger”. I share fashion, makeup, recipes, home decor, and DIY projects. Aka my life.
Now you may be asking yourself, “what if I don’t know exactly I want to blog about?”. That’s OK. Take some time to think about it and revisit when you are ready. Or, you could go ahead and create your blog and just start writing and let the ideas come to you. There is no “rule” that you have to have it all figured out right now.

Step 2: Choosing a Blogging Platform
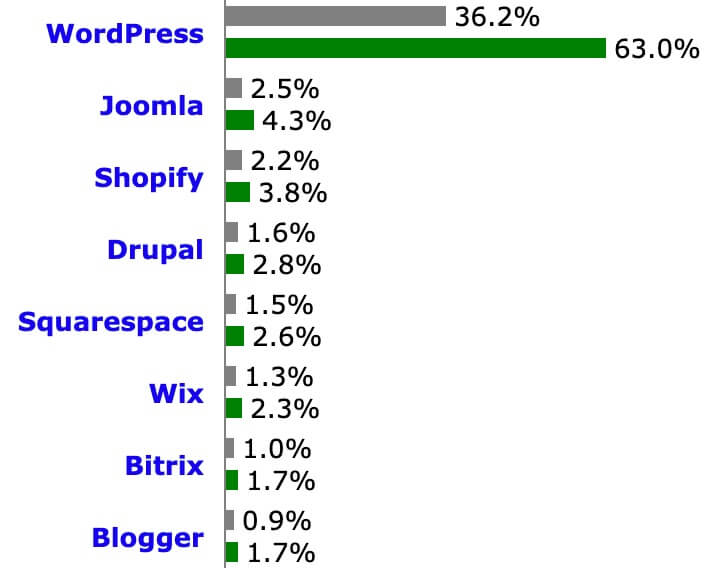
When I finally decided on my niche and began to put the pieces together I realized very quickly that I needed to choose a platform that worked best for me. There are many to choose from, however WordPress is the most popular, and free.
Step 3: Choosing a Host
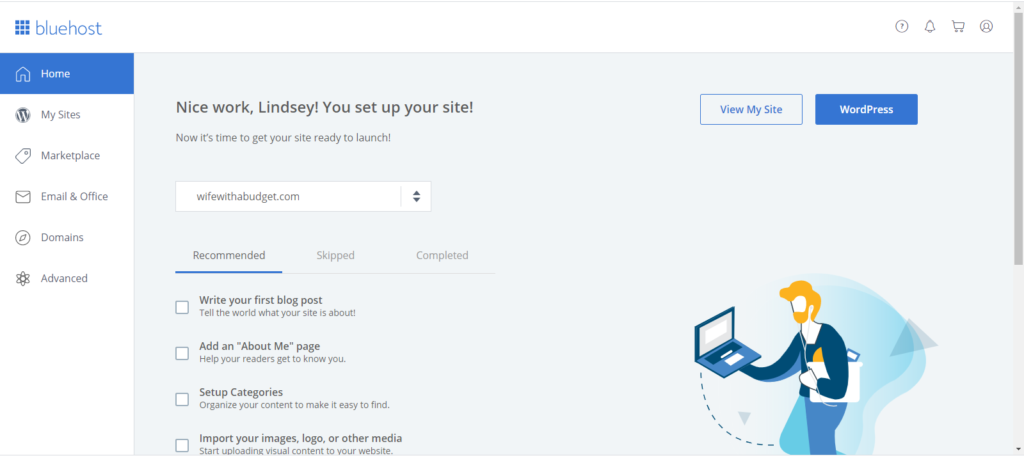
A host is a company/site puts your blog on the internet. The hosting company I’ve personally use, purchased and highly recommend to beginners is Bluehost. The setup is fast, easy and they install WordPress for you automatically (Step 2). Plus, they have a money-back guarantee.
CLICK HERE TO GO TO BLUEHOST click the green button & receive a special discount!

Step 4: Choose a Plan
The plan I chose is the Basic plan. I only have this website and new I was only going to have this one only. At least for now. I didn’t want to get ahead of myself. However, depending on your niche or goals, choose which plan is right for you.

Step 5: Choose a Domain Name
Now the fun part! You get to choose a domain name/website name for your blog! Now, you may come in to a little issue where the one you want is already taken (boooo!), but don’t worry! You can always come back and choose it later. I already knew mine & it was free reign so I snatched it up before anyone else could!

Step 6: Set Up Your Account
This part may seem scary, but it’s quick. You’ll enter all the normal account setup things: contact info, package info, package extras (I unchecked them all), payment and password. After some questions about the nature of your blog (P.S. all are changeable or skippable), you’ll be asked to pick a theme.


Step 7: Select a Theme
For now, you can just choose a free theme, unless you want to go ahead purchase a premium one from that site. When I did this step I chose a free theme so that I could learn more before spending any more money. You can always change your theme so at this point, just pick one. We will discuss how I got the theme I have now later on.

What’s Next? Log in to Your Blog!
Congrats!! You now have a self-hosted WordPress Blog! This section is for tying up a few loose ends. Be sure to complete all of these next steps to get off on the right foot. See below for the details.
Log into WordPress
Click the WordPress button from the last step above. (Don’t see it? Click Account Login in your Bluehost confirmation email.)

You’ll be taken to your WordPress Dashboard:

The WordPress Dashboard is the mother ship of your blog. This is where you will edit, create new posts and manage all aspects of your blog.
Do you see the “coming soon active” notice at the top of the screen? That means you have NOT officially “launched” your website yet. I personally did not click “launch” until I made sure all the kinks were worked out. I had multiple posts published and ready to go and the entire site was looking exactly how I envisioned. You do not have to do it this way, however I highly recommend it. You wouldn’t serve a meal half cooked would you??
Remove Your Temporary Domain
Your site was set up on a temporary domain. This is standard. Obviously you’ll want to switch to your permanent domain. How you do that depends on what you chose in Step 5 above.
- Did you create a new domain? Activate it. Check your email inbox to find the domain activation email. Click the button inside to complete the activation process. Simple. Bluehost will automatically switch it for you.
- Did you opt to choose a domain later? Register & assign it. In your Bluehost account, click Domains > Register in the left column. Enter the domain you want, add it to your cart and complete your purchase. (If you chose the Choice Plus plan, there should be a credit in your cart to make it free.) Now go to Domains > Assign and choose your new domain from the drop-down menu.
Wait 2-24 hours for the changes to take effect. To test it, type your permanent domain into your browser’s address bar. If your permanent domain sticks without forwarding to your temporary domain, you’re all set!

Secure your site with SSL
Once your permanent domain is working, you need to secure it. A secure site gives your visitors peace of mind. It also keeps your site on Google’s good side.
You can tell if a site is secure or not by the way it looks in the address bar. An unsecure site begins with http:// but a secure site begins with https:// like so:

Get Familiar with your Blog & WordPress
This is a good time to publish some basic pages like your About page and Contact page. Play with your site/the dashboard a little bit to get a feel for what you are working with. I took a day or two of messing around, trial and error before actually getting the hang of it.
Customize Your Blog Design
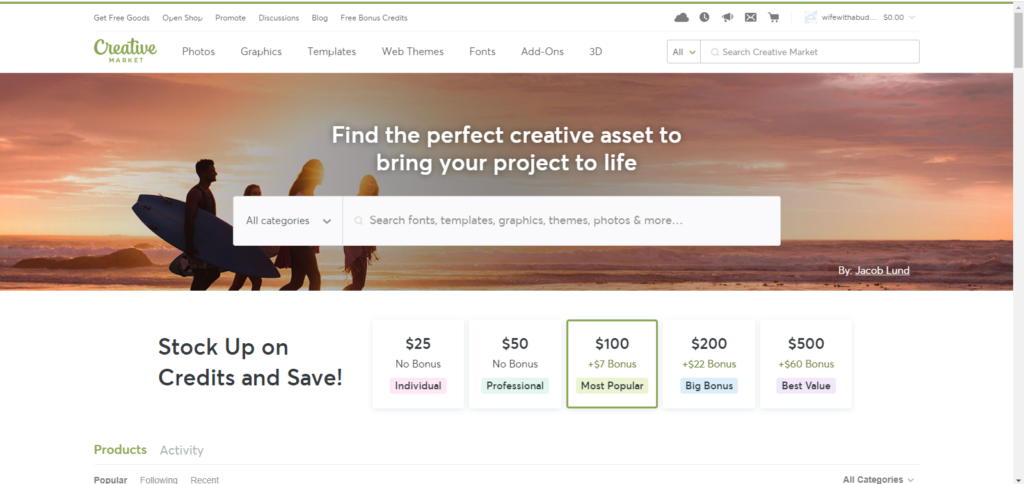
Finally, the fun part! Well for me at least. I want to introduce you to Creative Market. This is a website where you can purchase a website theme, fonts, graphics and more. I personally purchased my website theme from Creative Market and not only was it super simple (the provide you with instructions) but helpful. You are buying from creators, so if you have a question regarding your theme then you can message the designer and they will assist you.
CHECK OUT CREATIVE MARKET HERE!

Now, you might be a little overwhelmed, especially if you are not very computer savvy. If we are being completely honest, I was VERY overwhelmed. I purchased the theme I wanted and then was like “OK now what?” The best advise I could give is to play around with your site. Get familiar with it. Try new things. I played with plugins and widgets and different menu set ups for days and days before I got my site to where I like it. When you are creating a website & basically a brand for yourself there is no timeline. Take your time, do it right. I understand the feeling of wanting to get it done right away, but trust me when I say, your viewers will know if your site is “half-a$$ed” Sorry to be so blunt, but they will. You want to create an environment for your readers that is easy to navigate, pretty, and welcoming; a site they will want to visit over and over again!

What’s Next?!
Congratuations! You have made it this far and are ready to officially start blogging! Creating content is KEY. I would suggest that before you “launch” and make your site public to the world to have 5-10 blog posts written & prepared to post on your site. There is no need to have them all posted at once, but at least have them ready! I try to write at least 2 blog posts a week. Now, I don’t always post 2 a week, but I get them ready so that when the time is right all I have to do is click “publish”!
In all actuality, I prepared about 30 posts (which could include DIY tutorials, recipes, links to shop, etc.) WAY before I launched my site. I wanted to have at least 2 posts ready for each category before I went live, so that my audience had more content to look at! I didn’t want every single thing I had written to be live so that my readers would have more to look forward to, but I did want them to have more than 1 or 2 things to view.
I would suggest that before you “launch” and make your site public to the world to have 5-10 blog posts written & prepared to post on your site. There is no need to have them all posted at once, but at least have them ready!
I hope that this little “how-to” post helped you and you are now on the path to create something AMAZING! Feel free to comment or email me if you have any questions about this post at all! I will do my best to help you and try to make it a little easier for you.
If you liked this post don’t for get to let me know! As always, follow me on all the socials! Facebook, Instagram & Pinterest. Tag me in your posts, I love to see my tips help others. If you want to check out more posts or shop a little, check these out!
